1. Introduction
Setting up qPCR reactions with multiple templates and genes can feel tricky at first. Don’t worry — once you understand the steps, the process is simple and gives reliable, reproducible results.
This guide breaks down the workflow, showing you how to calculate reaction volumes and set up your qPCR plate step by step.
2. Experimental Design
- 3 cDNA templates
- 3 target genes + 1 reference gene (4 genes total)
- Each reaction performed in triplicate
- 20 μL reaction system using 2× qPCR Mix
3. Reaction Number Calculation
For each gene:
- 3 templates × 3 replicates = 9 reactions
Total reactions:
- 9 reactions × 4 genes = 36 reactions
Important: Always prepare extra volume to compensate for pipetting loss.
It is recommended to calculate based on 10 reactions per gene.
For simplicity, you can calculate based on 10 reactions per gene.
4. Master Mix Calculation
For each well (20 μL system):
- 2× qPCR Mix: 10 μL
- Forward primer: 0.8 μL
- Reverse primer: 0.8 μL
- Nuclease-free water: 6.4 μL
Total per well (excluding template): 18 μL
Total for 10 reactions (per gene):
- qPCR Mix: 100 μL
- Forward primer: 8 μL
- Reverse primer: 8 μL
- Water: 64 μL
Total volume: 180 μL per gene
5. Master Mix Preparation
Prepare four tubes labeled:
- Gene1
- Gene2
- Gene3
- Reference
Add qPCR Mix, primers, and water into each tube according to the calculated volumes. Mix gently.
6. Plate Setup
Step 1: Add Template
- Add 2 μL cDNA template into each well
- Dispense along the tube wall for better visibility
Step 2: Add Master Mix
- Add 18 μL of corresponding gene master mix
- Pipette gently to mix
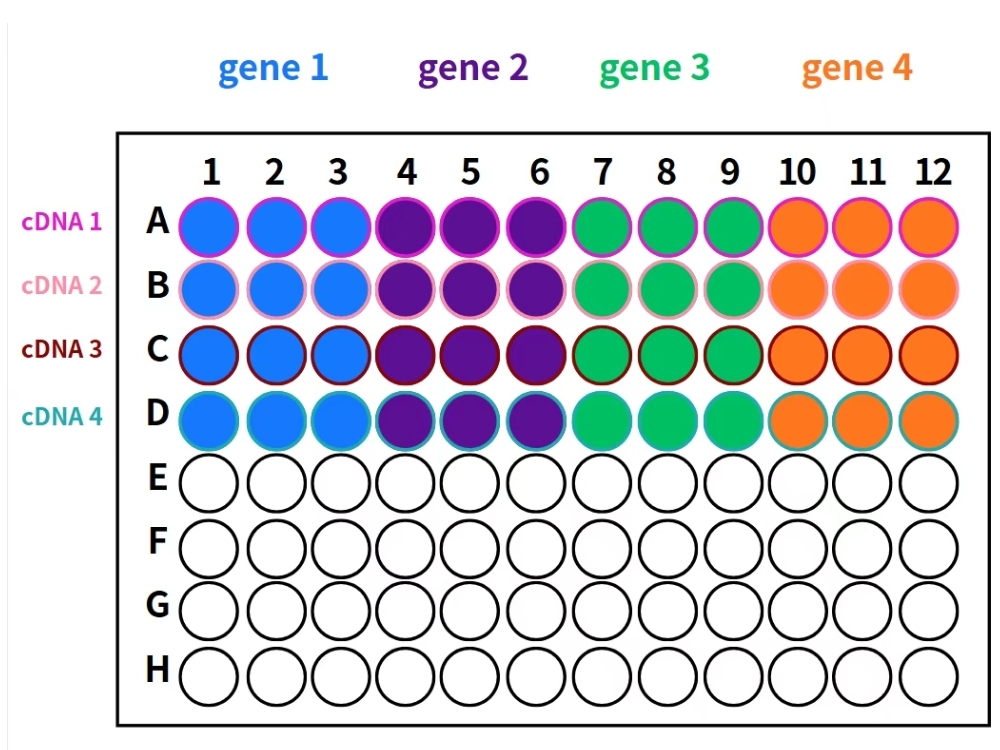
Figure: qPCR Sample Loading Guide
Step 3: Final Preparation
- Seal the plate
- Centrifuge briefly
- Load into qPCR instrument
7. Summary
Organizing reactions by gene and preparing master mixes in advance helps to:
- Reduce pipetting errors
- Improve consistency
- Save time
Once the workflow is mastered, even complex qPCR setups become efficient and stress-free.
👉 Explore our lab consumables to support your experiments: Lab Consumables
🧪 More lab tips and tricks: Visit our Blog